Sunday, 9 June 2013

FARM CHICKS 2013

Spokane, Washington is a beautiful city to visit.  The downtown core is full of great shopping, great atmosphere, and great eateries.  It also is the home to "Farm Chicks"  Antique Show.  This year was my second year attending.  It is Jam packed with Vendors for every style of Vintage.  Rustic, Junk, Country, Retro, Man Cave, Painted, Garden Decor & Shabby.  Something for everyone.

We all came home with great treasures, and memories.  We walked the downtown core on the paths through the park, taking in all the scenery & atmosphere.  Next year we would love to take our Cruiser bikes and do the same.  The first night we ate at the Post Street Ale house & the next night at the Flour Mill, & both had great food.  The Flour Mill you can eat outside on their Veranda at Clinkerdaggers overlooking the River below that is on the old railway bed.  Built in 1895, and was renovated & turned into the restaurant in 1973 for the 1974 Expo.

Here are some of the photos I took along the way.  At the Market, there was a small amount of Booths that I had time for photos in all of the huge crowds, we battled through while shopping. I was honestly lucky & crazy to wait for no one to be in some of these photo shots because it was wall to wall trains of people.  With 268 Booth spaces there was a lot to see & take in.  Hurrying to pay for items you found before someone else came along & spotted them as well.

We all came home with treasures we had on our lists & then some.

Enjoy!!

(If you want to see a photo closer up, just click on it)


The Flour Mill


In we all go!

Here we go...


My Fave booth, but it was sparse here.

I loved their booth last year too.

Front Entry display


Another Fave with all the Lavendar & Boxwoods.


My cart I decorated for Farm Chicks
Crochet & Fabric Flower embellishments

Saturday, 6 April 2013

La Joie de Vive

We have been back home for a couple of weeks now after our Spring break, traveling on the road to Palm Springs.  A wonderful family vacation for our little family of 4.  We were gone for 10 days and spend 3 full days in Palm Springs and the rest traveling through 5 different States.  After driving through Washington & Oregon we made it to Boise, Idaho and after staying the night in a hotel we were looking to eat breakfast somewhere.  We drove around Boise looking for an restaurant or eatery.  Rather lost in a city we have never been to my husband decided to use the "Urban Spoon" App. on his phone, so we stopped in a shopping area to use it.  We decided to visit a place called "Janjou Patisserie".

So many great looking, mouth watering, tarts, cheesecake, meringue, macaroons, fruit, croissants & more that we could feast our eyes on when approaching their counter.  Not to mention the beautiful Barista machine for making the ultimate Cafe Mocha, and Cappucino.

i


Not only are these works of Art, the taste was delectable, and we each ordered a Quiche with a salad on the side with a vinagrette dressing.  The Quiche was the best I have ever tasted & was mouth watering with every bite.  It had 2 different cheeses in it and made us want to buy the rest of the Quiche in the display case to feast on for down the road.  C'est Magnifique!!!

My girls ordered croissants, and cheesecake, and we not only had the Quiche, we had Fruit Tarts & Cafe Mocha, and a Cappucino.

Yummy Cafe Mocha


All their ingredients are Fresh, Preservative & Artificial ingredients free, hormone free eggs, and only the best.  It is noticeable, every flavor is present when it hits your palette.


Owner & Head Artisan Moshit & her husband Chuck treated us like friends, and family.  They both said we were probably used to eating this kind of food and drink in Cafe's in Canada, and yes we are but not as good as this.  Moshit studied at Estella in Israel and learned from a teacher who learned everything from Le Cordon Blue, Paris.  (Yes, this is the same culinary school Julia Child attended)

Chuck gave us some advice on what to see when we got to Palm Springs because he was from 29 Palms.  It was a wonderful experience and I hope if you live, or are in the Boise, Idaho area...you must stop in their Patisserie.  It will have you craving the flavors, just like we did.
Cookies for the road

Visit their Website at

Wednesday, 13 February 2013

Ruffly Tote Tutorial

I have been wanting to make a few of these Ruffly Tote bags for awhile now.  There seems to be so many different styles and colours all over in the Pinterest world.  Very easy to make, and even easier when starting with a ready made tote from Michaels or Walmart.  You can find different sizes, colours, and thicknesses.  The great things is you can also use Stamps and create sayings or any design you want to personalize it to your own taste, or that of a friend.

I decided to make this particular bag for a dear friend for her Birthday.  I fell in love with it while creating it and am sure that it will be the first of many to come.  I have a stack of fabrics just waiting to become stylish.

Here is my take on the Ruffly Tote & a Tutorial to help you achieve the look or a similiar look.  Enjoy!!

Materials needed

Materials you will need:

1~Plain Tote bag (you can purchase these from Michaels or Walmart in groups of 3, or one and in colors)

2~Vintage or new buttons

1~4" wide, and same width as your tote cut fabric for top Band.

4~ pieces of cut fabric that are 4" wide & 1 1/2 times longer than the width of your bag.

1~ Small strip of fabric about 2" wide to make a fabric flower.  Follow the tutorial link for length.

Needle & Thread to sew embellishments and buttons.

Pins to help place fabric on the bag while sewing.

Any other embellishments you want to put on the purse.

Placing top band
Cut a piece of fabric 4" wide and 1/2 inch on either side longer than the tote for seam allowance.  This will be your top band of fabric as shown in the picture above.  Turn under all 4 sides & Press with a iron.  Place & pin the fabric band onto the bag as shown, making sure it fits your tote to its side seams.  Leaving the bottom edge free so you can place the first Ruffle's raw edge underneath.  Don't sew it in place quite yet.  You need to make your Ruffles first.
Cut the corners to get rid of bulk.
Cut a piece of fabric for the first ruffle.  4" again, and longer than the first strip because once you gather it its much smaller. I guess on the measurement for mine, and I think I made it 1 1/2 times longer than the bag. Depends on how ruffly you want it.  If you can cut all your fabrics out together this will save a bit of time and you can plan which colour you want to go, and where on your tote.  Turn under & press again.  Cut the corner on a diagonal to get rid of some of the bulk when sewing it. Now straight stitch your 3 side hems (sides and bottom), try and do the same process for each Ruffle as you go along.  This saves you from switching back and forth between 2 different foots.  As seen & explained below.
Attached Gathering foot
If you have a Gathering foot or Ruffle foot for your machine, attach it to make the ruffles. (If not you can make them by hand.  Using a loose stitch and pulling it to make it gather.  Then run a straight stitch over to keep it in place and easier to work with.)  Read the instruction in your owners manual on how to use your Gathering foot.  Its very easy and this was the first time I had ever used mine.  Basically just sew as usual and the foot does the gathering.  Some machines are lucky enough to come with a Gathering foot, and some don't and you can purchase them separately for your machine.  (Which sometimes can be costly)  If you are doing lots of projects where a Ruffle is needed I suggest its worth it.
Ruffles Hemmed & Gathered.
Your Ruffles should look like this when you are done them.  Hemmed on 3 sides and 1 side (top) gathered and you can leave it raw or hem it as well, it will just be a smaller ruffle than what I have made.
Pin back 1st Ruffle and Sew on 2nd.
This picture above shows the first Ruffle sewn in place underneath the top band.  So now you need to place the 1st Ruffle under the folded edge of the Top Band, and pin in place.  Straight stitch around all 4 edges of the Top Band, and sewing your first Ruffle into place with it.  Pin back 1st Ruffle as shown, so its easier to work underneath for the next Ruffle.  After that Pin your next Ruffle underneath your 1st Ruffle as shown above.  Decide how much of the Second Ruffle you want to show.  I  pinned them about 1 inch apart.
2 Ruffles and a Band straight stitched on

You could leave it just at 2 Ruffles, or continue to straight stitch the other 2 Ruffles on just as you did the 2nd one.  If you leave it at 2 Ruffles there is room for a Fabric stamped Embellishment or a sew on Monogram.

Sewn on Embellishments
 Hand sew on your Buttons over top of where the Handle joins the bag.  Take your strip of Fabric and make a Fabric flower.  You could make this flower bigger if you like.  I've included the link to the Tutorial where I learned how to make a Fabric flower from.
 
Finished Tote

Sew on your Flower and any other Embellishments and you are finished.  It is a beauty I fell in love with.  You could carry on and do the other side if you wish.  There is just so many great ways this simple tote can be beautified!!  Hope this was helpful & would love your feedback.  Please let me know if I left a step out or you are stumped. Enjoy this simple beauty!!

Fabrics used were purchased at Hobby Lobby, USA and Fabricland, Canada.

Here is the link to the Wonderful Blog I learned about through Pinterest, on how to make a Rosette.  I love it and am going to become a follower of her beautiful site.  You will definately love the 2 steps it take to make the flower she has.  I just used Step 1 here.

The Decorated House by Donna Courtney.
http://thedecoratedhouse.blogspot.ca/2012/02/how-to-make-fabric-flower-rosette-step.html


Thursday, 3 January 2013

Saying Goodbye to 2012 and Hello to 2013.

Can't believe another year has quickly gone by, and welcoming in a new year already.  Around the world there was lots to shut the door to 2012 for.  Not just sorrow, and heartache from a far but also close to home as well.  On the other hand there was lots to be Thankful, and excited for as well.  Vintage Cove had a successful year doing Markets & fairs, as well as lots of online sales.  Every season filled with new ideas and some brought to life.  I'm starting the New Year off with a full garage of furniture to transform and customer requests to get started on.  I want to branch out, broaden those Horizons at some point this year.  .Maybe start an etsy account, more markets, and more projects out the door and into new homes.  One of my resolutions is to Blog more often than I currently have been, be more organized with less clutter, and start saving some projects for my home as well.

Can't wait to get organized and get started.  Its January now, but it won't be long and spring will be around the corner and so busy I won't know where to start.


Here are some photos that I missed putting onto the Blog, but they managed to make it to my Facebook Fan Page during Christmas.


Part of my Country Christmas Craft Fair display

One of the wreaths I made

Christmas signs that were for Sale.

Side Table in our living room.

Our Christmas tree this year.

IDEAL Canning jar luminaries.

Part of our sideboard in the dining area.

Christmas Tree Handmade decorations

Front door Wreath with one of my signs.
Happy New Years Everyone from my family to yours.

 Wishing you all a Happy, Healthy & Prosperous New Year!!!  Thank you for letting me into your homes.

Tuesday, 25 September 2012

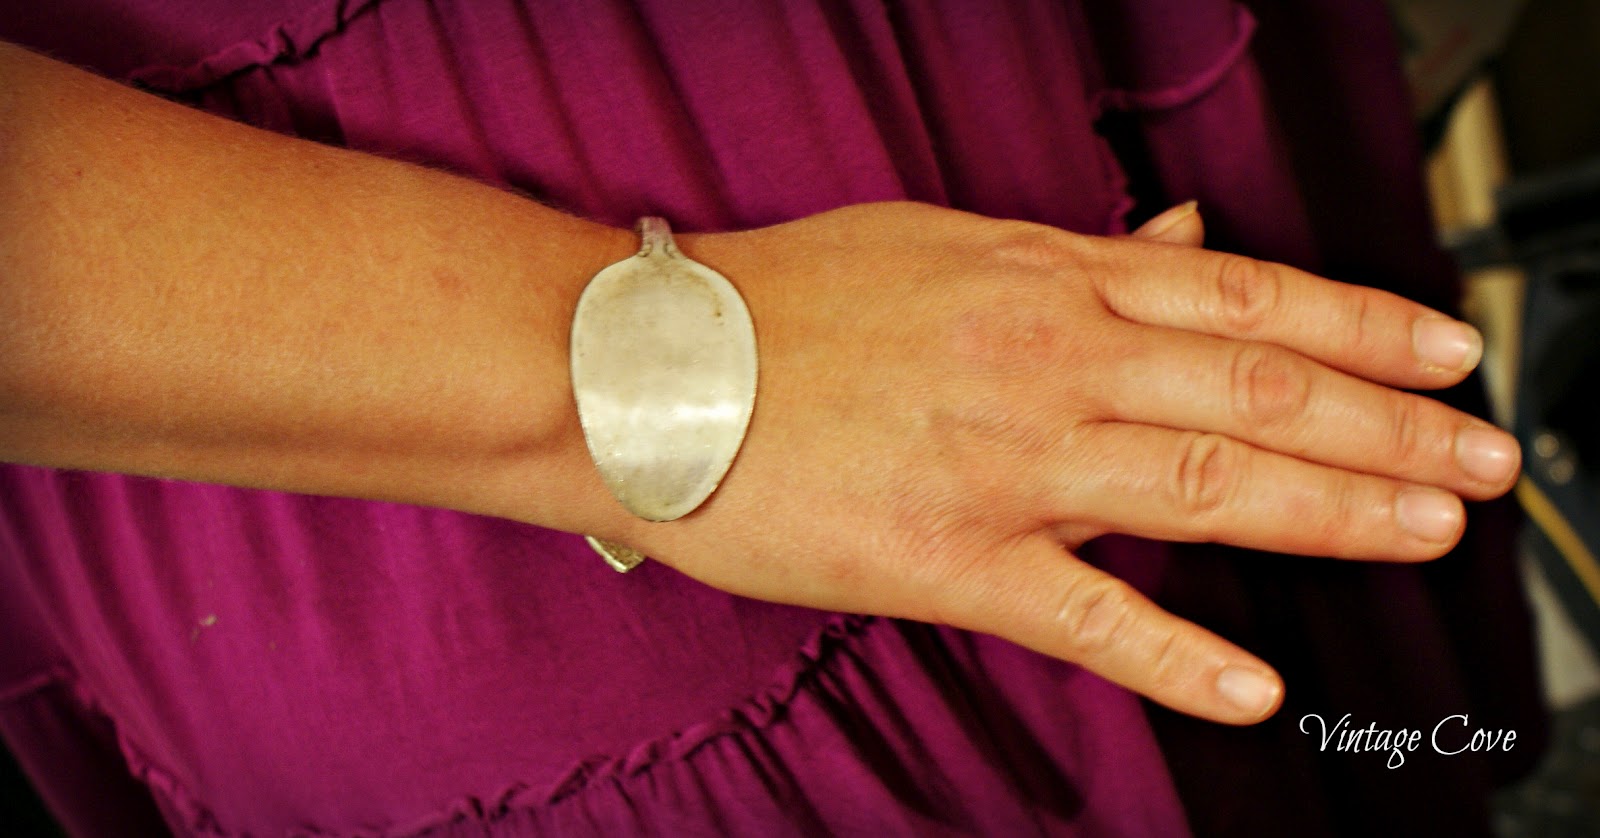
Silver Spoon Bracelet

I don't claim to be an expert in the making of a Silver Spoon Bracelet.  In fact this is the very first time that I  have ever attempted making one.  So my girlfriend Amanda offered to come & learn how to make one as well.  Trial and error, and a whole bucket of spoons to allow us to do that.   We lucked out on our very first try at one!!  Usually its quite the opposite when trying something new & learning.  The next 2 we were not so lucky.  So here is a full re-cap of our experience....

First of all we needed to heat the spoon up to change the molecular structure of the spoon so that its easier to flatten and pound out with the hammer.  This process takes a while depending on the softness of the Silver, and muscle power.  I would advise some earplugs for this procedure. Our ear were wringing a little with the sound of the hammer, and cutlery jingling all over the counter.  lol.

Heating it up

Amanda Heating the spoon

Diana Flattening the spoon
 We used a piece of scrap wood to hammer out our Spoon on, so not to wreck my workbench.
Using a metal hammer
The spoon tends to get fairly hot after using the Torch on it a few times to keep the temperature right for manipulation.  So a bucket of cold water nearby was handy to use when the spoon was too hot to touch.  When you get to the stage of bending & wrapping the bracelet to the size of your wrist, the water bath came in handy.
Water Bath


Cracked spoon
We were working away on a spoon & unsure why it cracked.  There could be many reasons why.  Too Hot, not hot enough, or that this particular spoon had more Electro Plate than Silver, and it was too hard to flatten.

In the Vice
The last bend
 We used the Vice to start bending the bracelet.  Covered it with material, as to not make any markings on the Spoon.  For the last part of the bending process, we had to take it out of the vice and do it by hand with 2 sets of pliers.
Almost finished project.

other side


Finished Product
 The great thing about this bracelet is it could be worn either way.   Spoon side up or decorative handle side up.

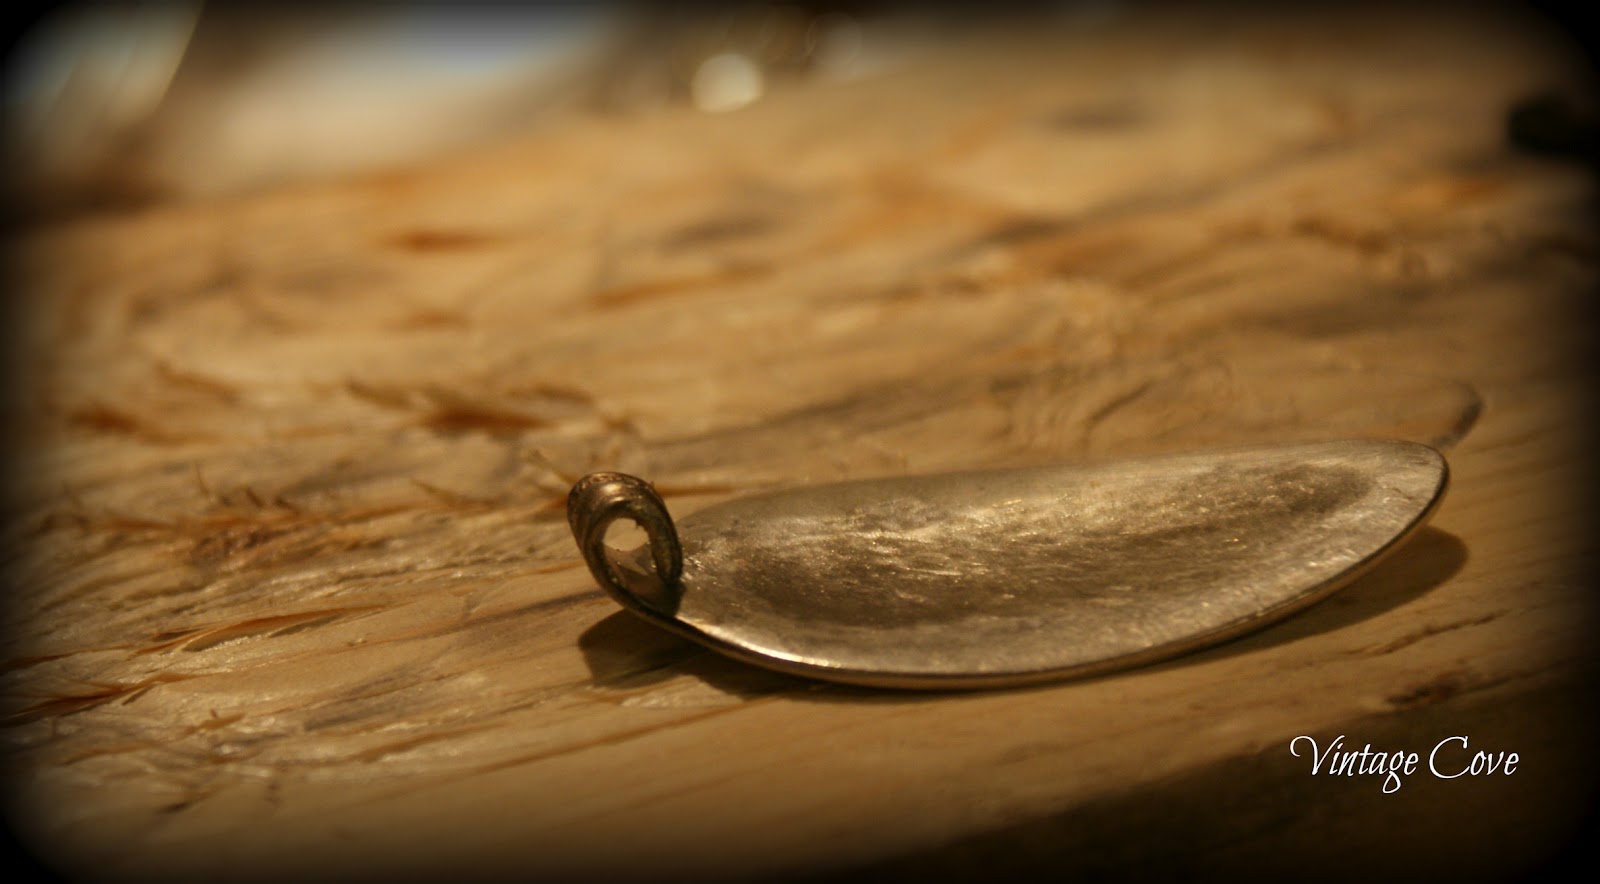
Another idea for jewelry is pendants.  After flattening the spoon, cut off the handle with a hacksaw.  With a Sanding stone on my Dremel tool, I rounded the edges & got rid of any sharp edges.  Then used a brush to soften the sanding stone marks.  While its in the Vice Bend it to get the loop for a necklace chain.  Buff it and its all ready to wear or engrave.
Getting rid of some rough edges
Pendant loop
 The next type of bracelet I'm going to try making involves this step shown below.  You will just have to wait and see what happens with that one.